DIY American Flag Wooden Heart Tutorial
Fourth of July will be here in 2 weeks. 2 weeks! How can it be July already?! I feel like we just playing in the snow like a week ago. Oh well, I still love the summer and I especially love Fourth of July.
I made a goal at the beginning of the year that I was going to spend more time decorating my house and making it feel homey. It was starting to look a little sterile, no curtains, minimal pictures and very few tchotchkes. So far this year I have painted 2 rooms, bought a coffee table and hung a few more pictures. Yay!
One of the other ways I’m trying to improve my house’s self-esteem is by decorating for holidays other than Christmas. While we go all out for Christmas the other holidays get severely neglected 🙁 I know it will take some time to get a collection of decorations for holidays, but you have to start somewhere, right?
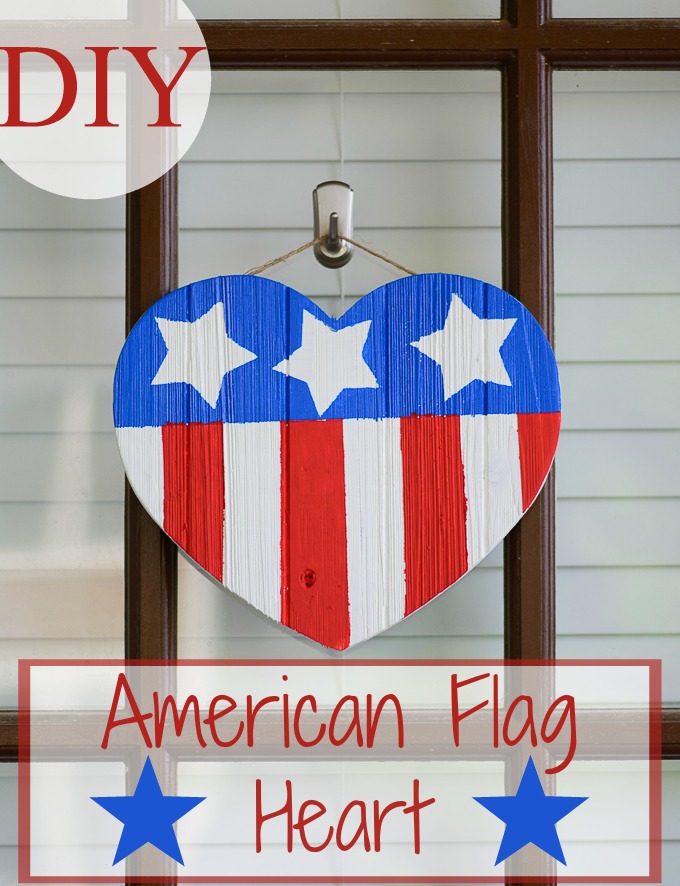
I decided to start with an Independence Day door decoration to hang on my front door. It’s not much but it’s a step in the right direction. It turned out so cute that I knew I had to share it all with you.
I loved how easy this was to make, all it took was a little paint, some tape and cut out stars and I had a pretty respectable Fourth of July decoration to hang on my door.
Instructions for DIY American Flag Wooden Heart Tutorial
Supplies:
Wooden heart (You can find these in any craft store or on Amazon)
Red, white and blue acrylic paint
Painters tape
Paint brushes or sponges
Instructions:
1. Start by painting the entire front and sides of the heart white

2. Let dry completely (usually 6-8 hours)
3. Place a piece of painters tape across the upper 1/3 of the heart (see picture below)
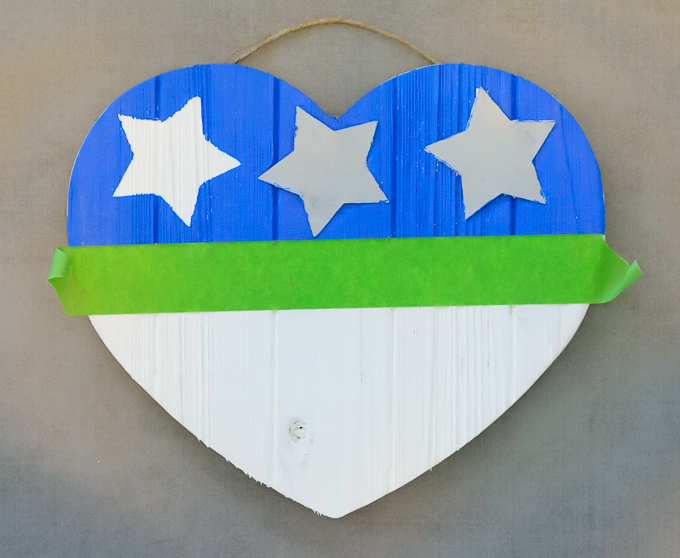
4. Tape paper stars to the wood. I used a large star punch, but you can find a template online in the size you want and just cut a few stars from the template.
5. Using a stenciling sponge paint the top part of the heart blue, making sure to dot the paint on, not brush it on, to keep it from bleeding under the tape and paper stars.
6. Let dry completely
7. Remove stars and tape
8. Put painters tape in stripes next to each other vertically on the bottom 2/3 of the heart (see picture)

9. Then remove every other piece of tape so you have even stripes
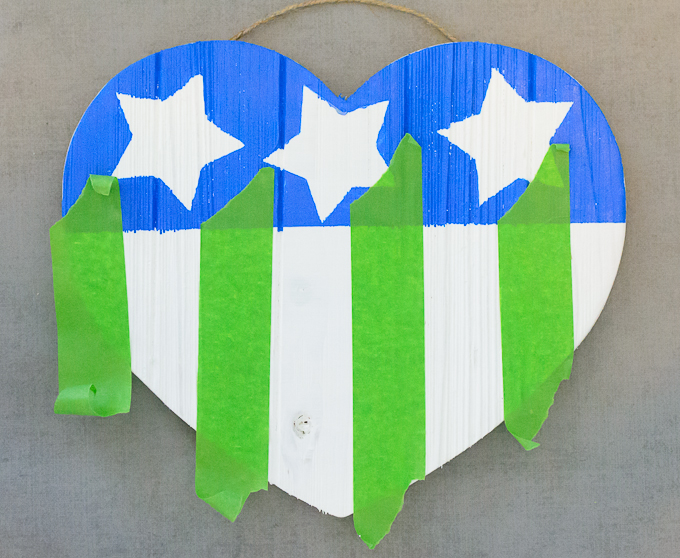
10. Put one more piece of painters tape vertically along the blue line at the bottom 1/3 of the heart (see picture)
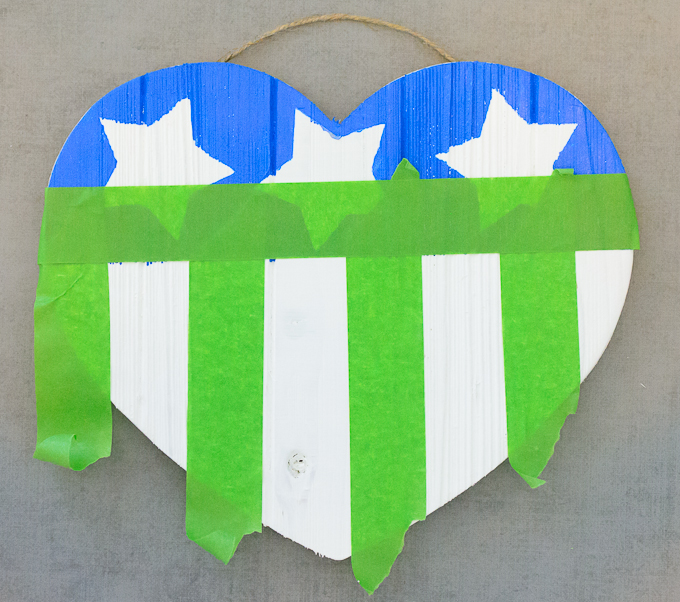
11. Using a stenciling sponge, dot red paint on the open stripes.

12. Let dry completely
13. Remove tape and touch up any parts that may have bled through with a fine paint brush.

You can opt to seal the paint with an acrylic sealer, but I like the rustic look without it, so I left it off mine.
There you have it, a very simple way to make a fun and festive American Flag Heart door decoration.
Happy crafting!


5 Comments