Halloween Mystery Boxes

Sharing is caring!

mystery box header

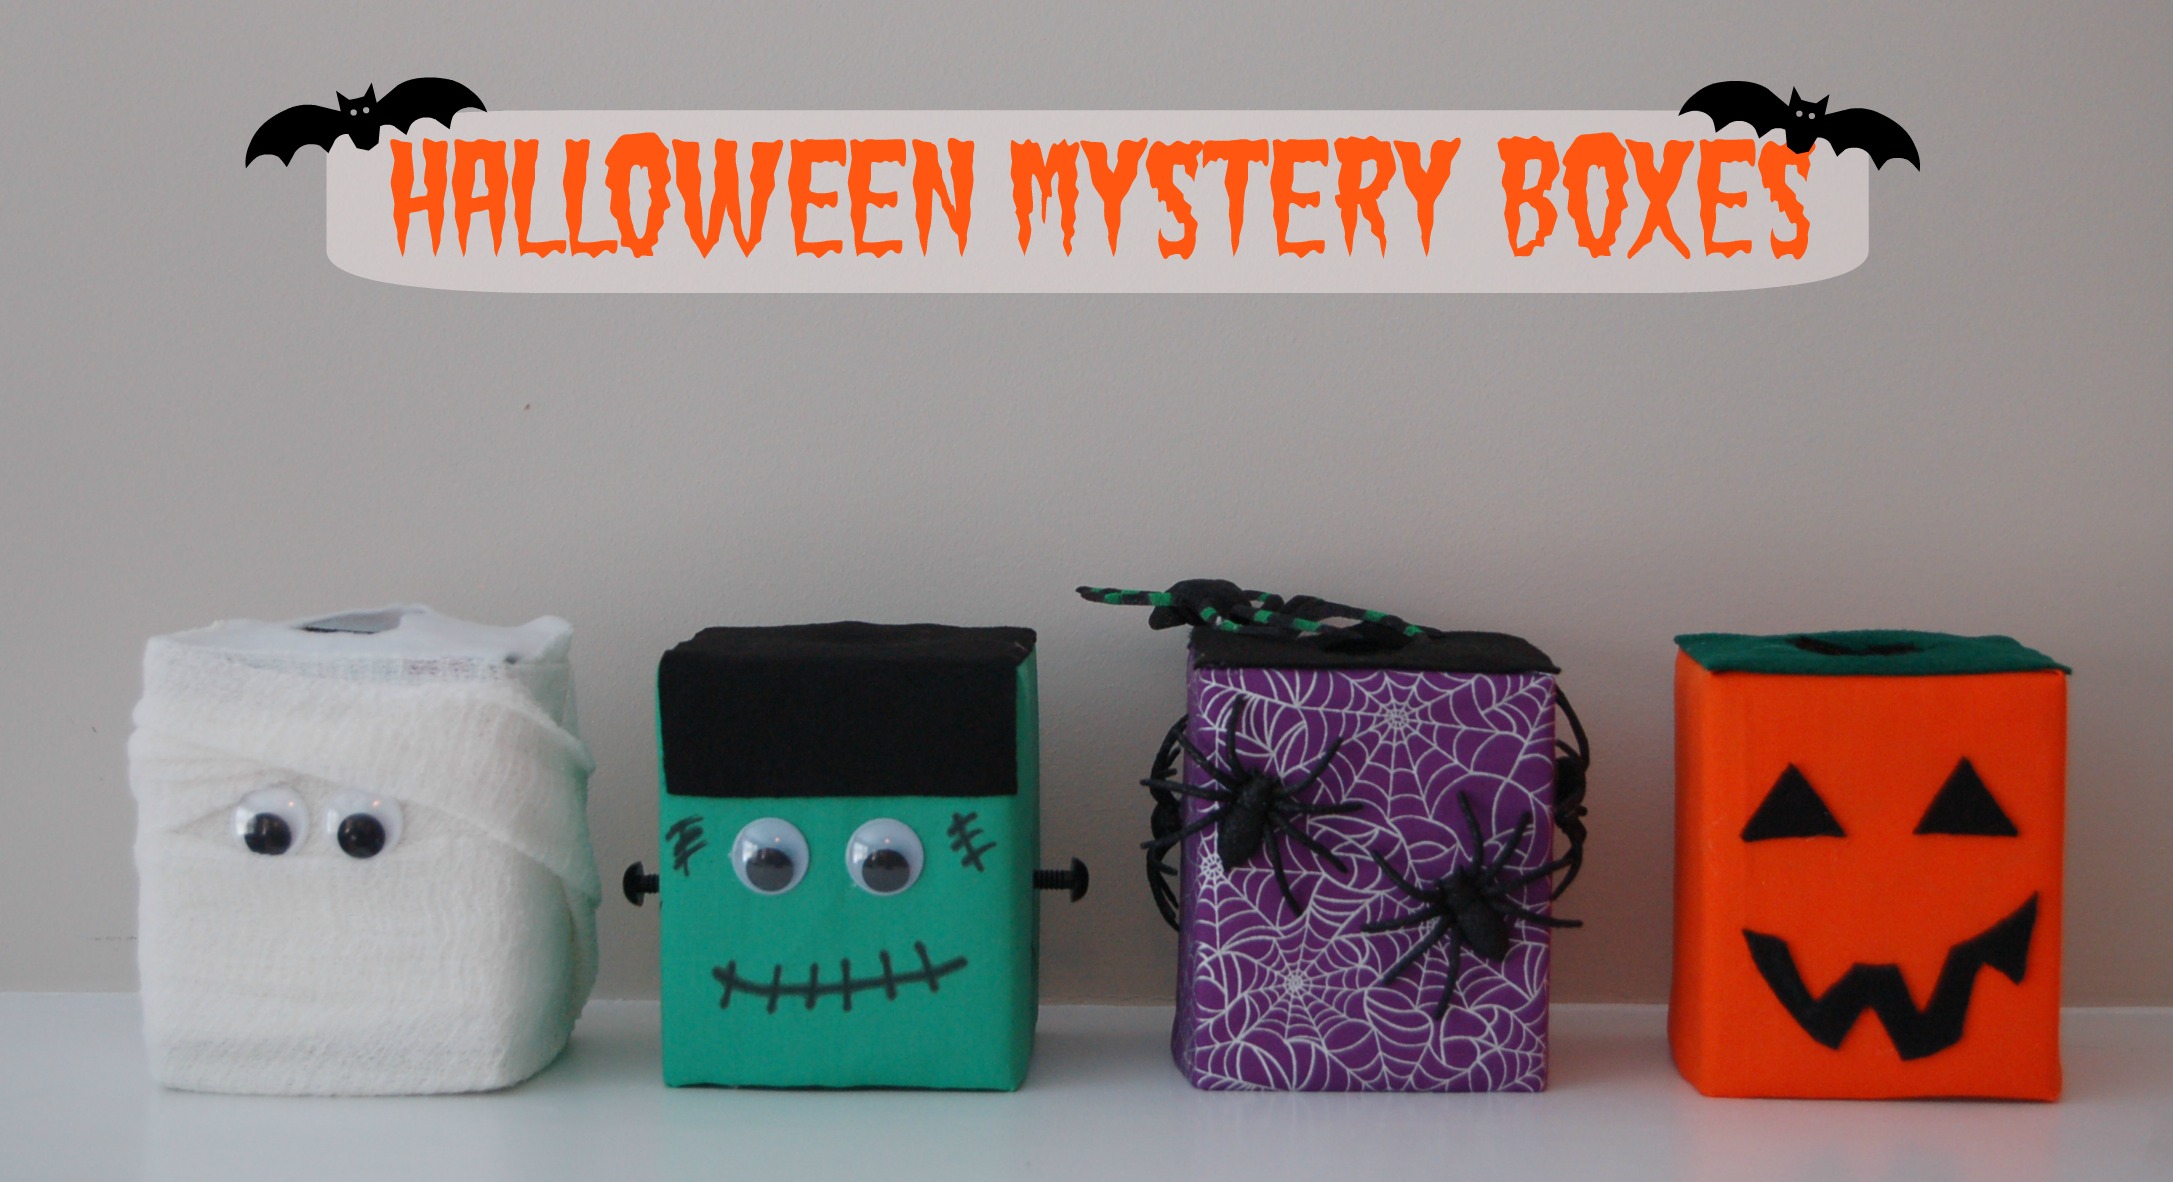
We had our big homeschool Halloween party this past Monday, I was trying to find fun activities for the kids to do and I remembered mystery boxes when I was a kid. Remember those? You stick your hand in the box and feel gross things like mummy eyeballs ( peeled grapes) and Frankenstein’s brains (cold cooked spaghetti).


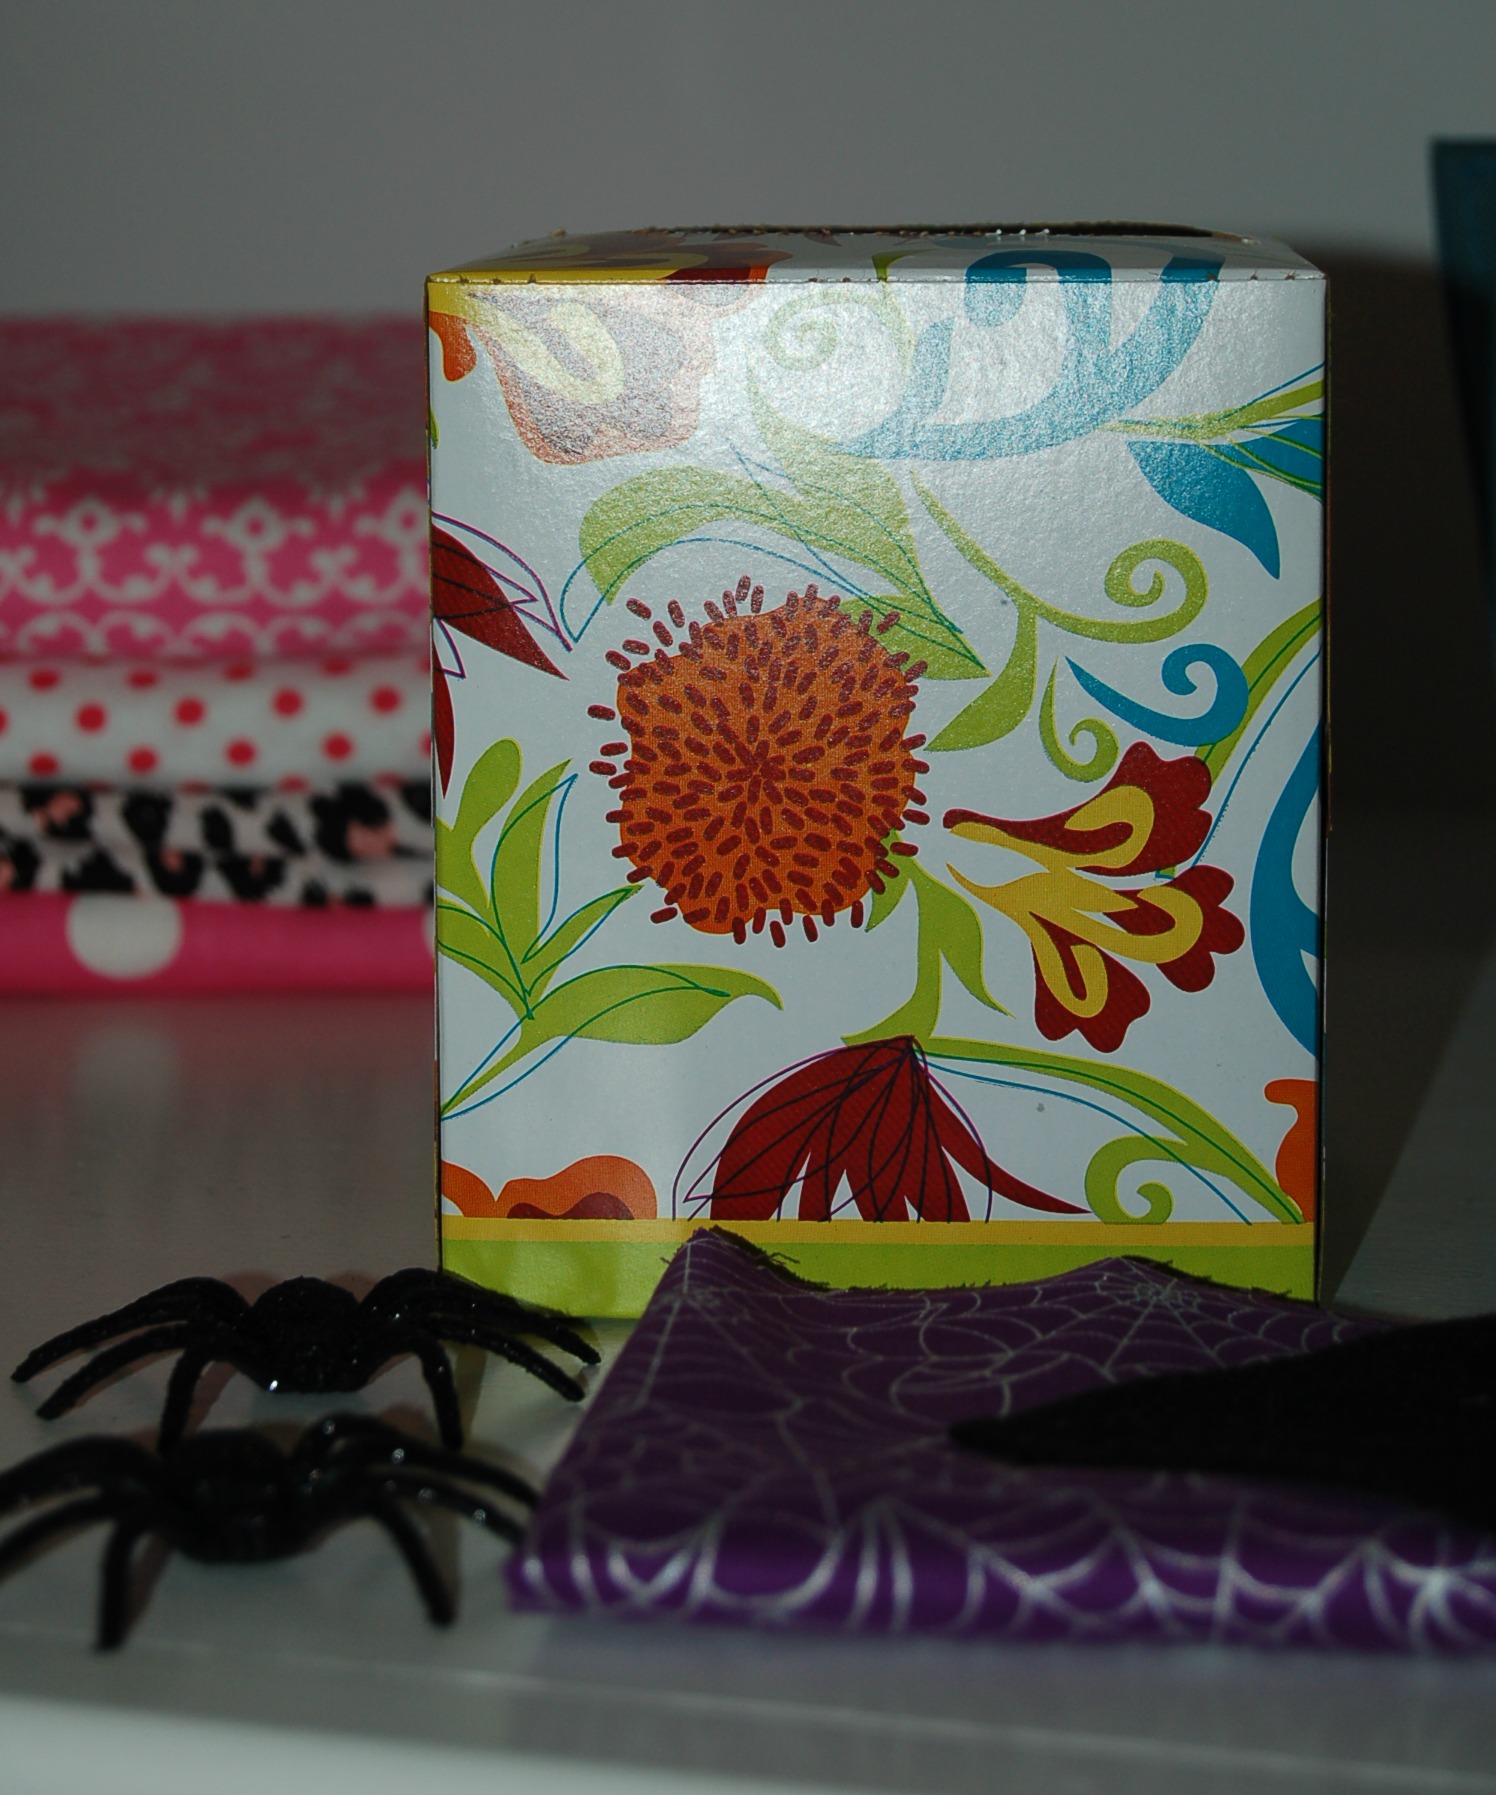
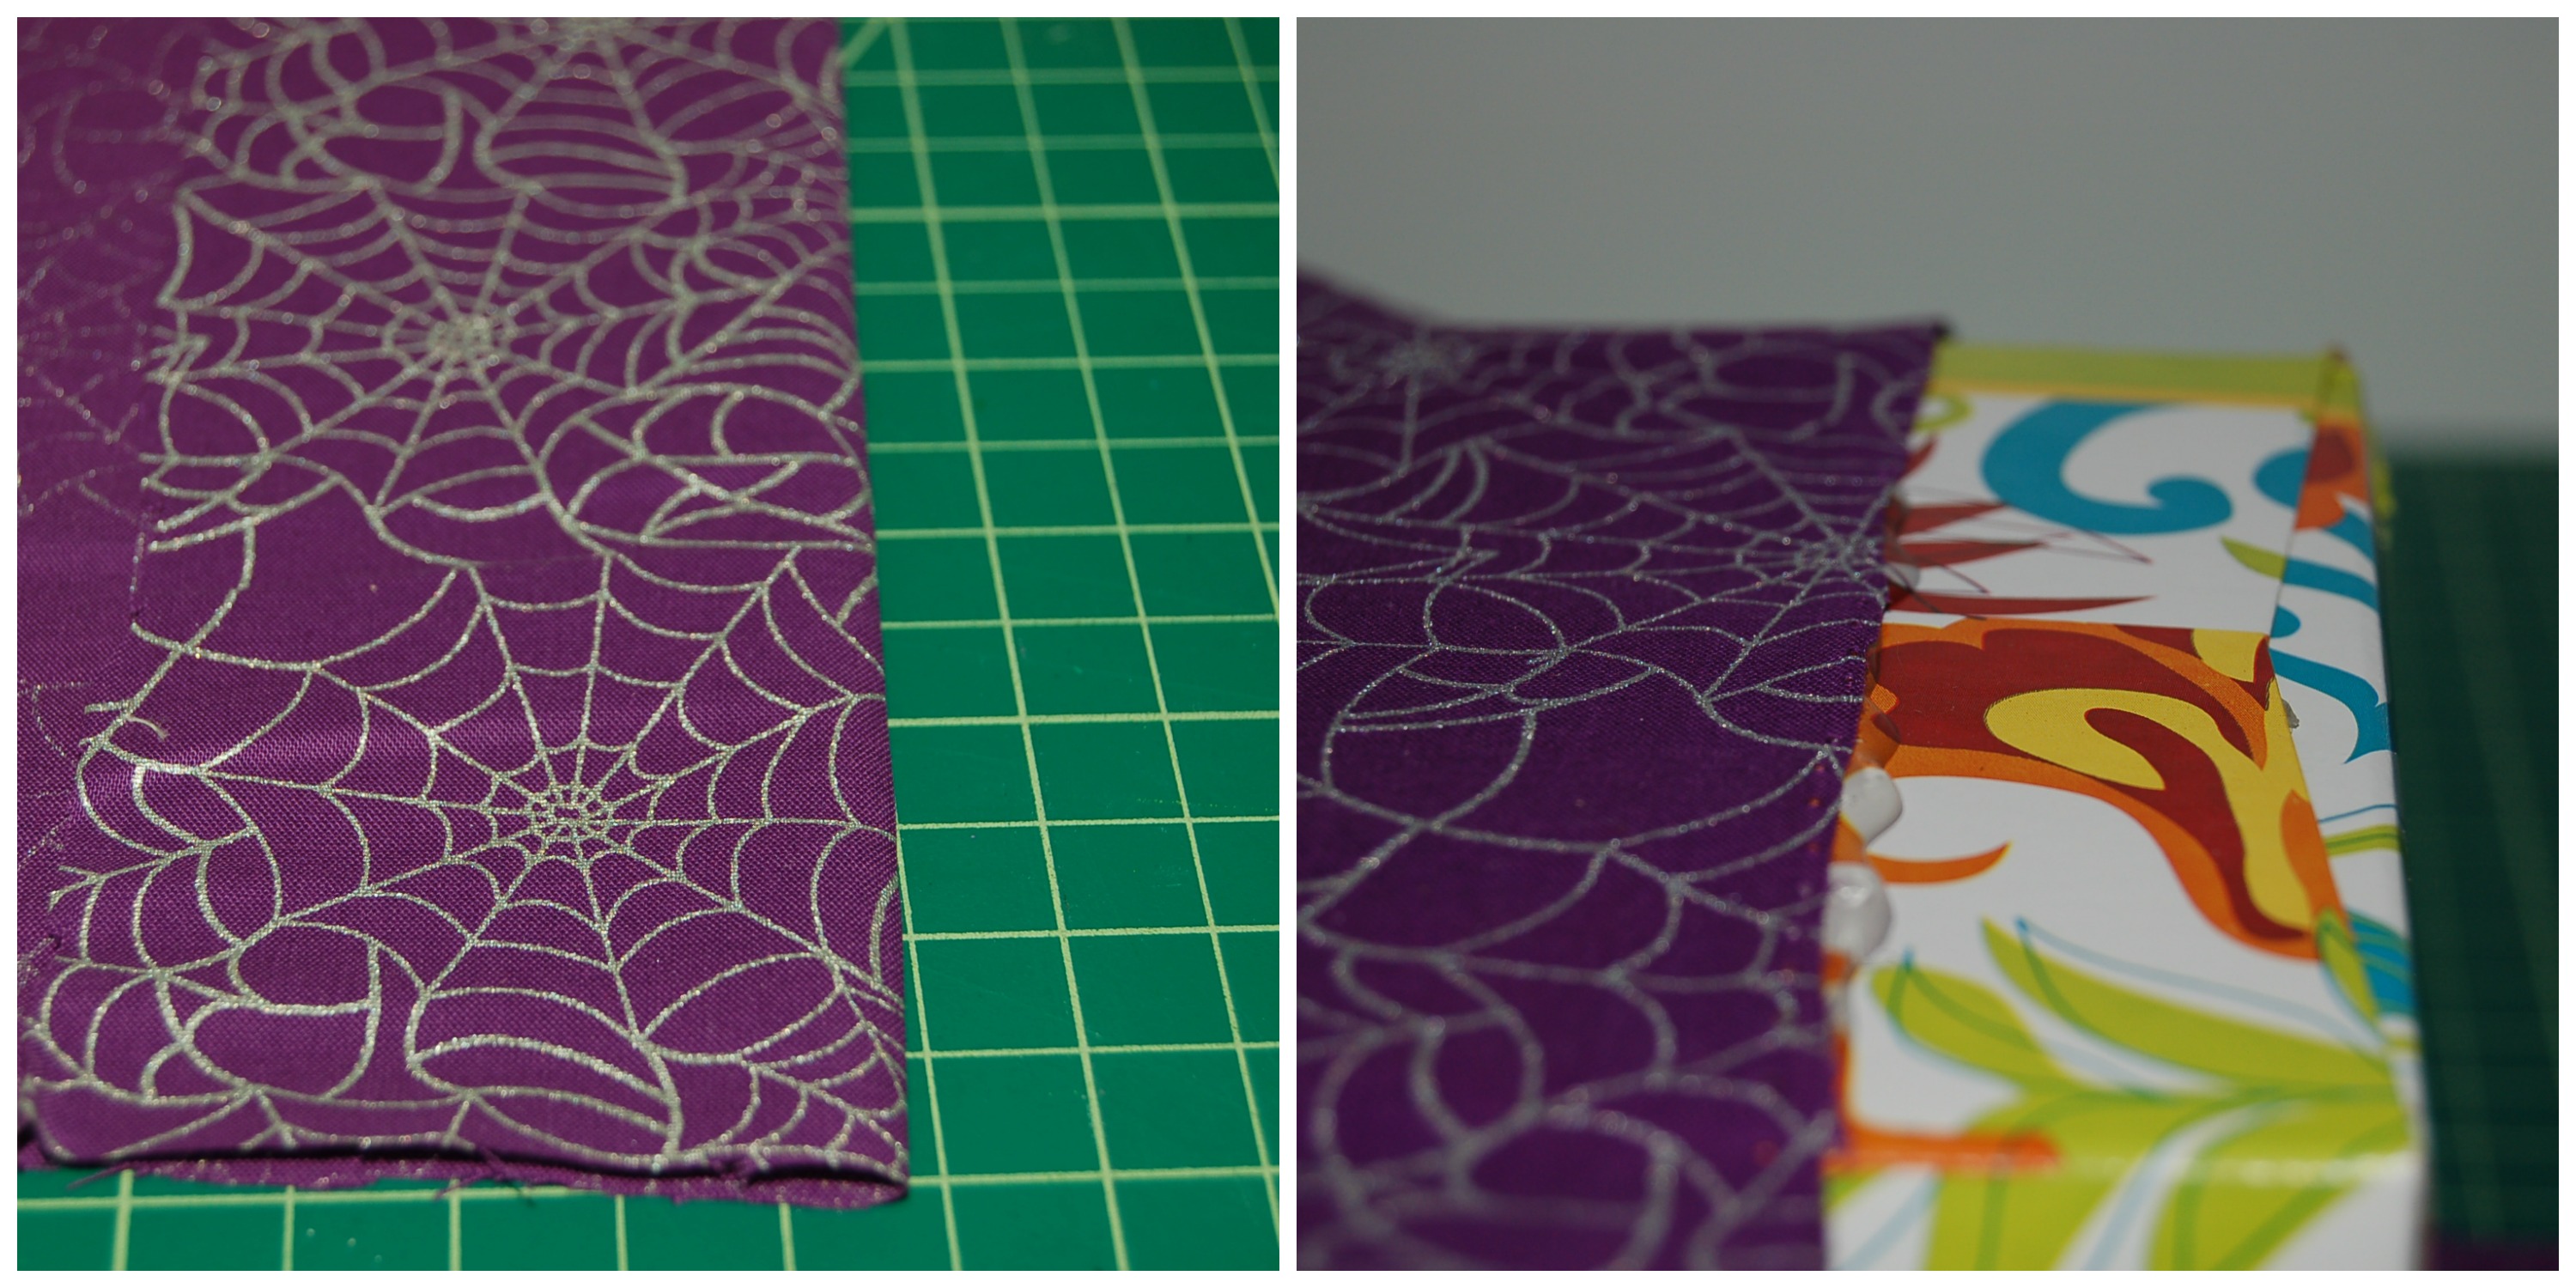
I decided to use tissue boxes and some old fabric I scraps I had to make these cute Halloween mystery boxes.

mystery box 1
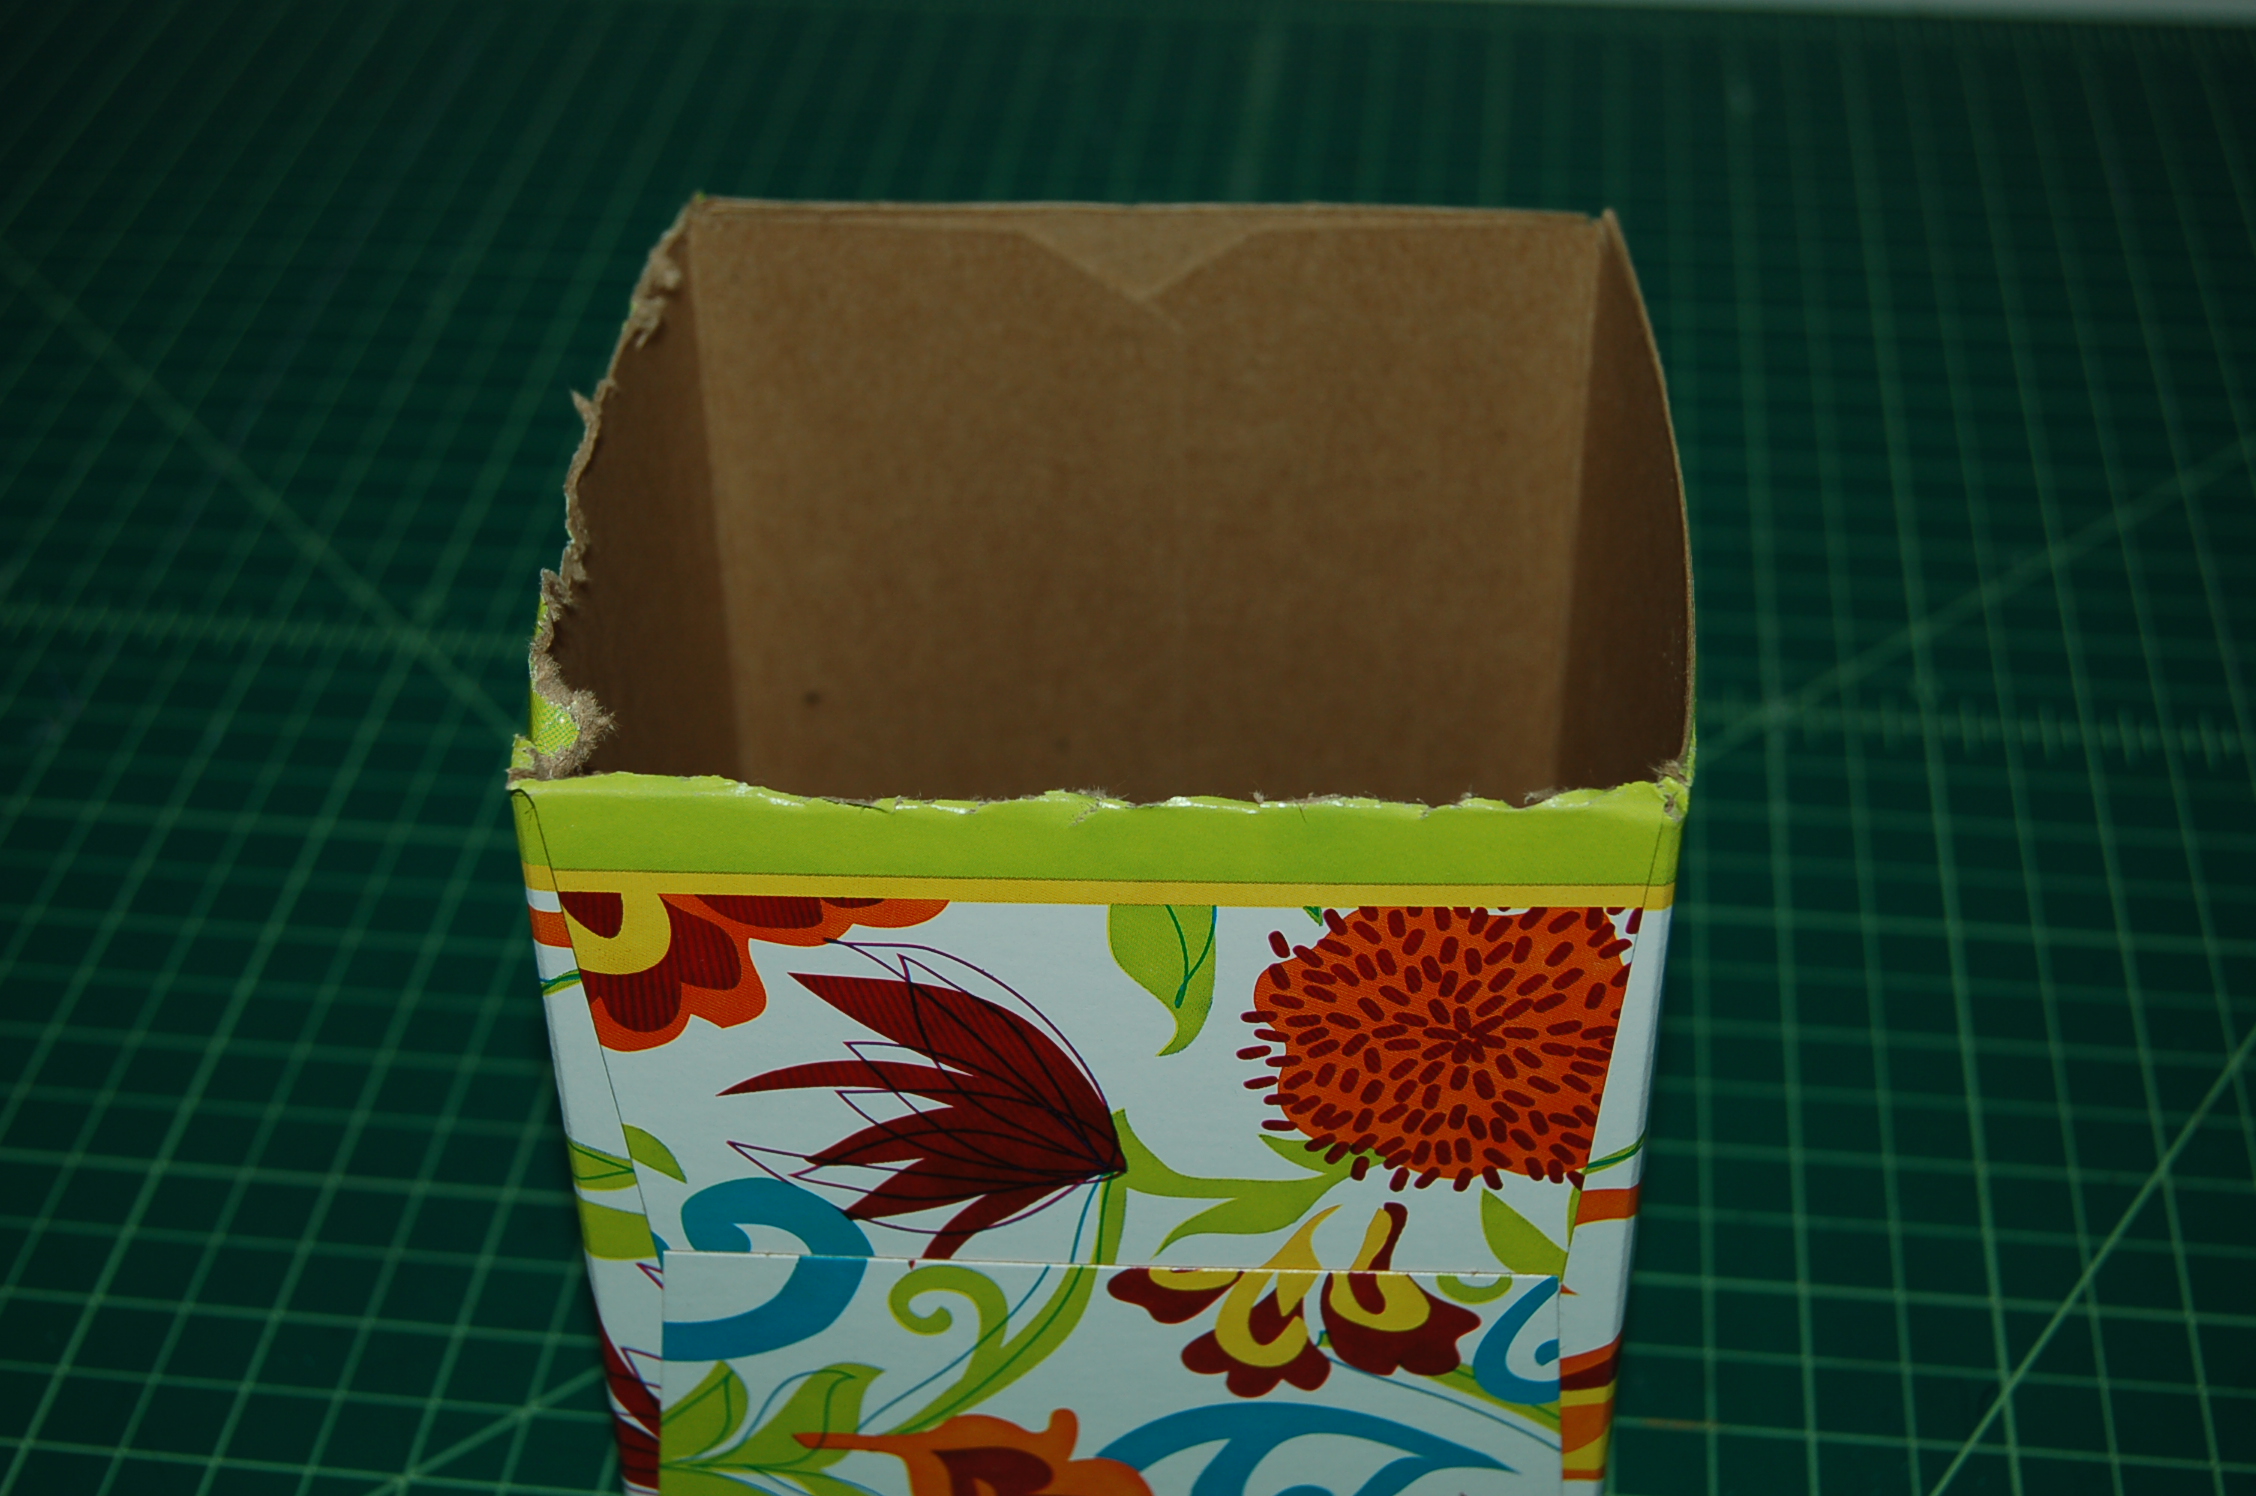
 First cut the bottom off of your tissue box, this will enable you to just place the box over mystery items.
DSC_0042
 Next, line your fabric up so that you have about 1 1/2 inches at the top of the tissue box and 2 inches at the bottom.
mystery box collage 2
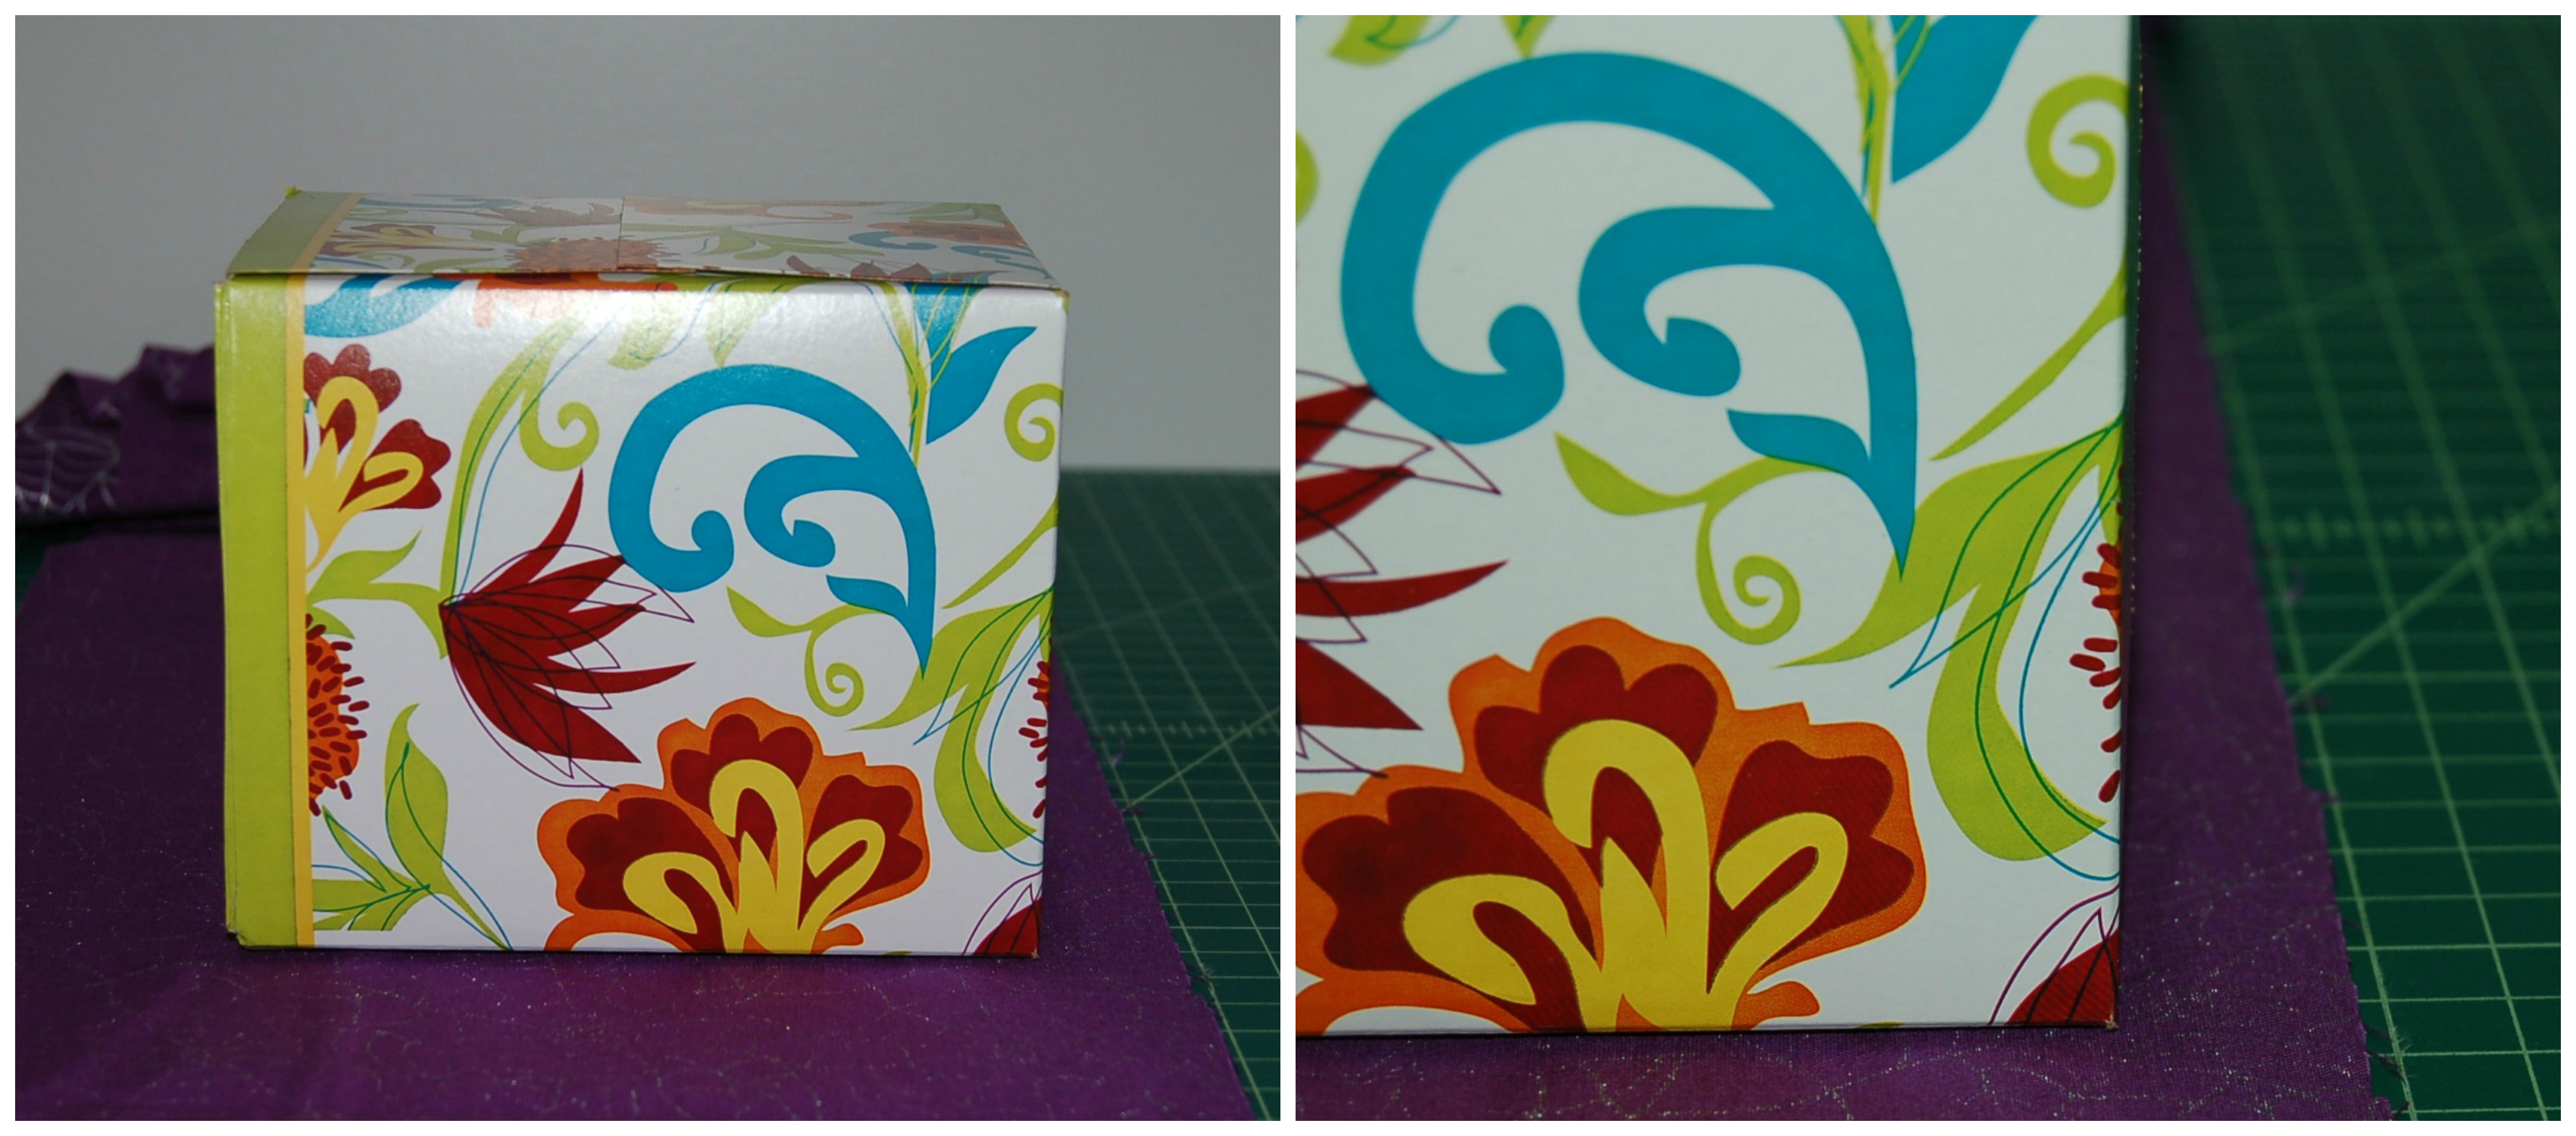
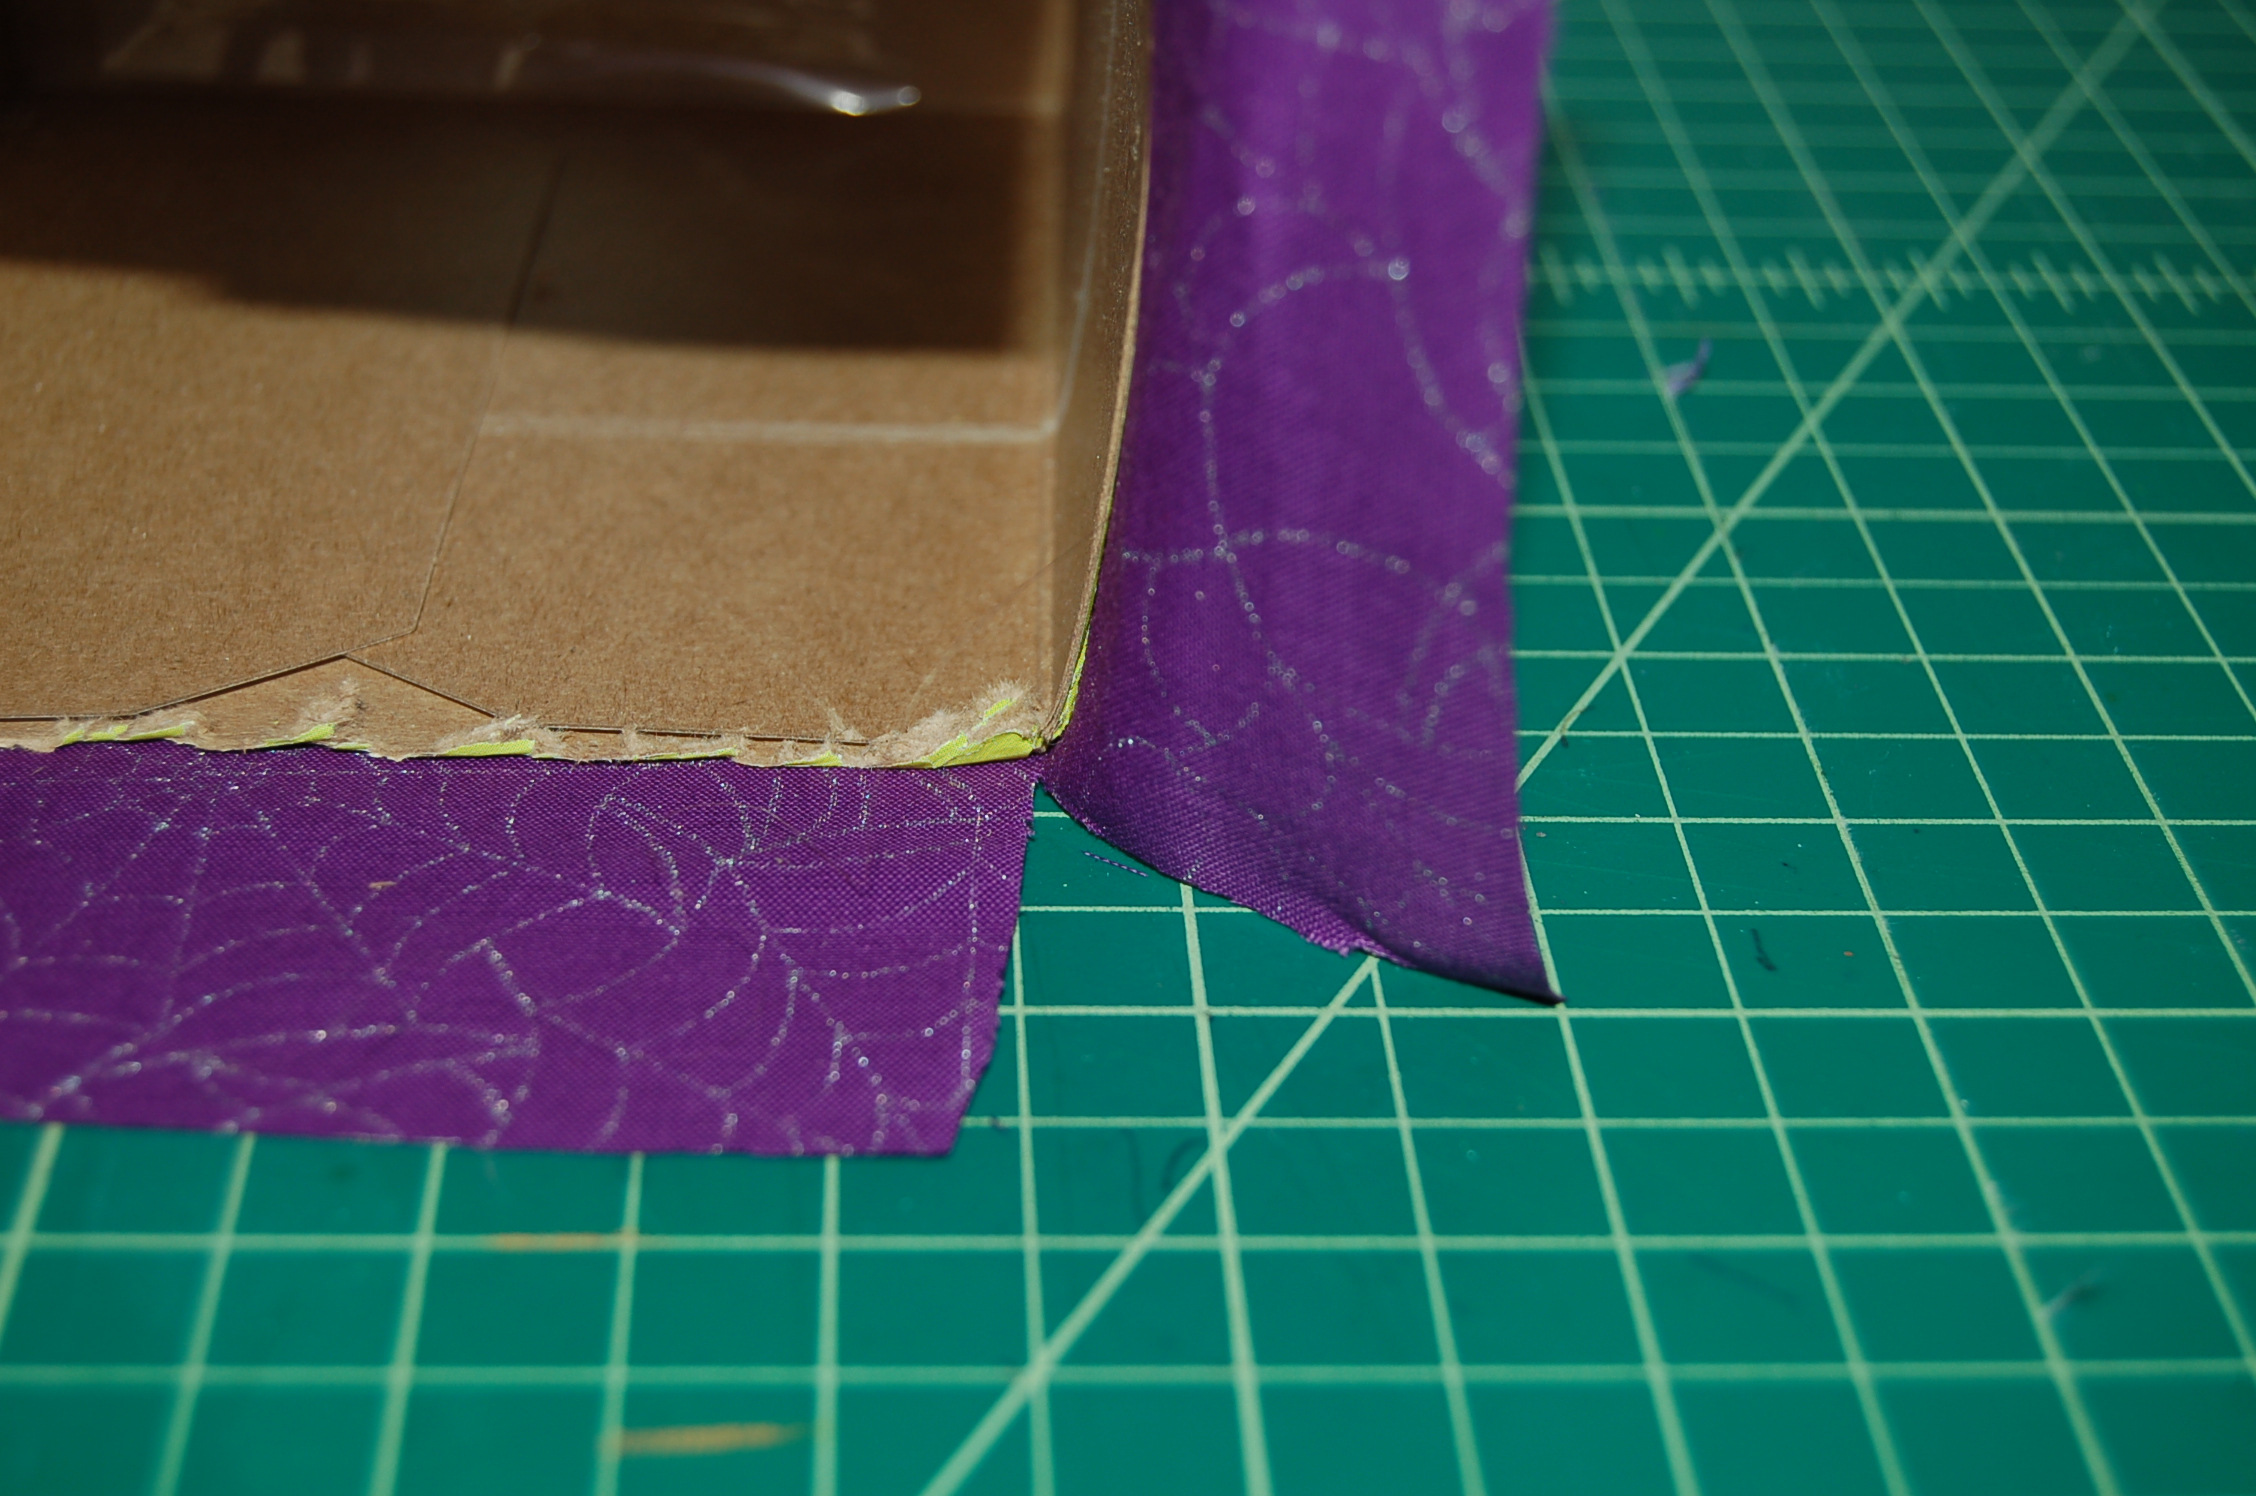
 Apply a line of hot glue to the tissue box and glue your fabric to the back of the tissue box.
DSC_0056
 Fold the other end of your fabric to make a neat seam. Apply a line of hot glue to the edge of the fabric that is already glued to the box then attach the folded fabric to the tissue box.
mystery box collage 3
 Next cut the corners of the fabric at the bottom of the tissue box.
DSC_0058
Fold the fabric into the tissue box and attach with hot glue.
mystery box 4
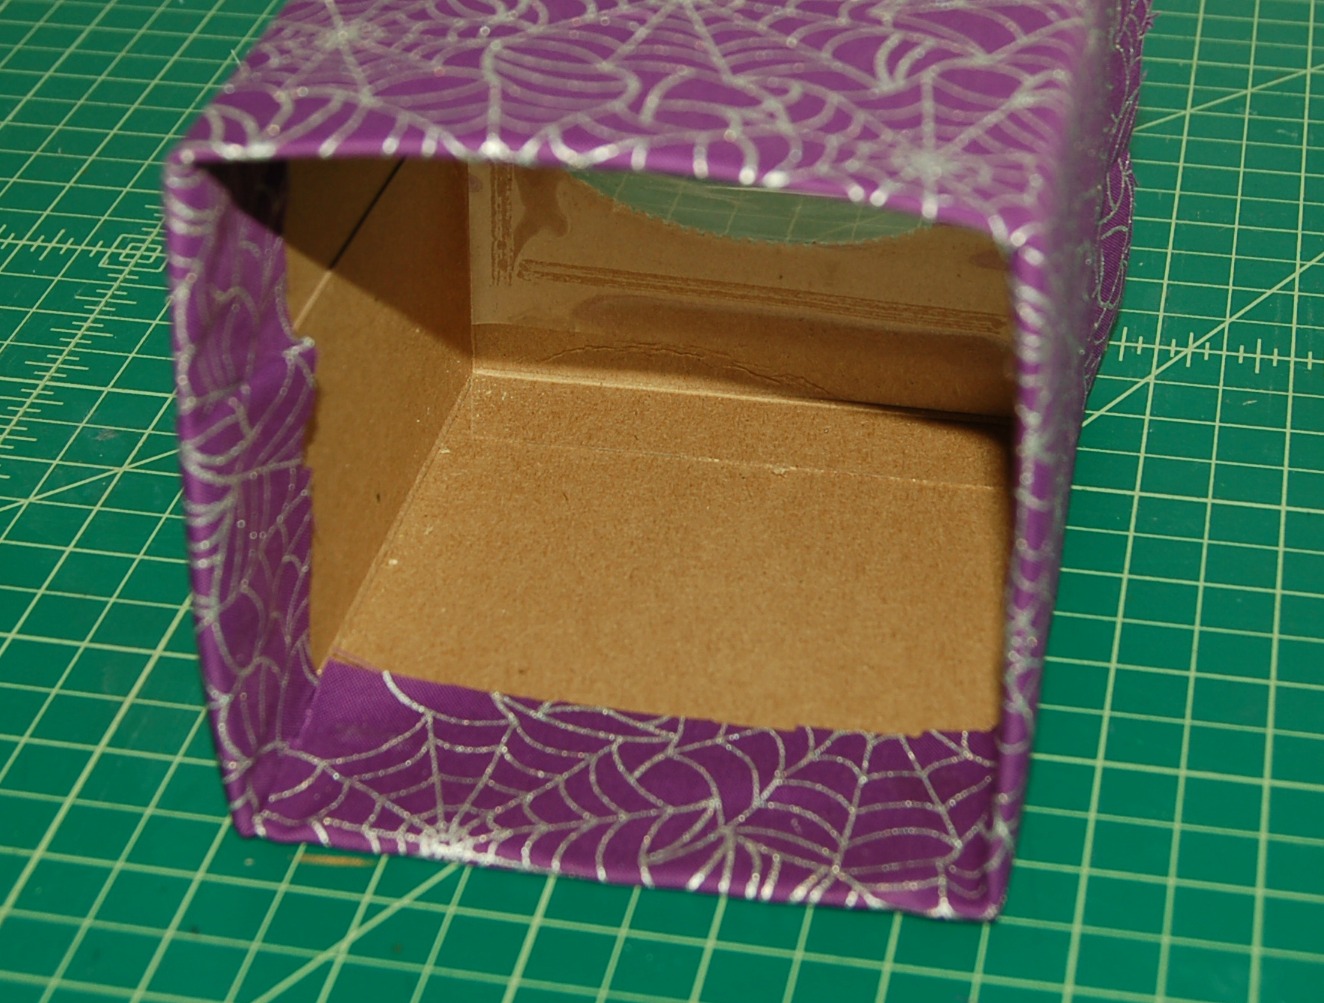
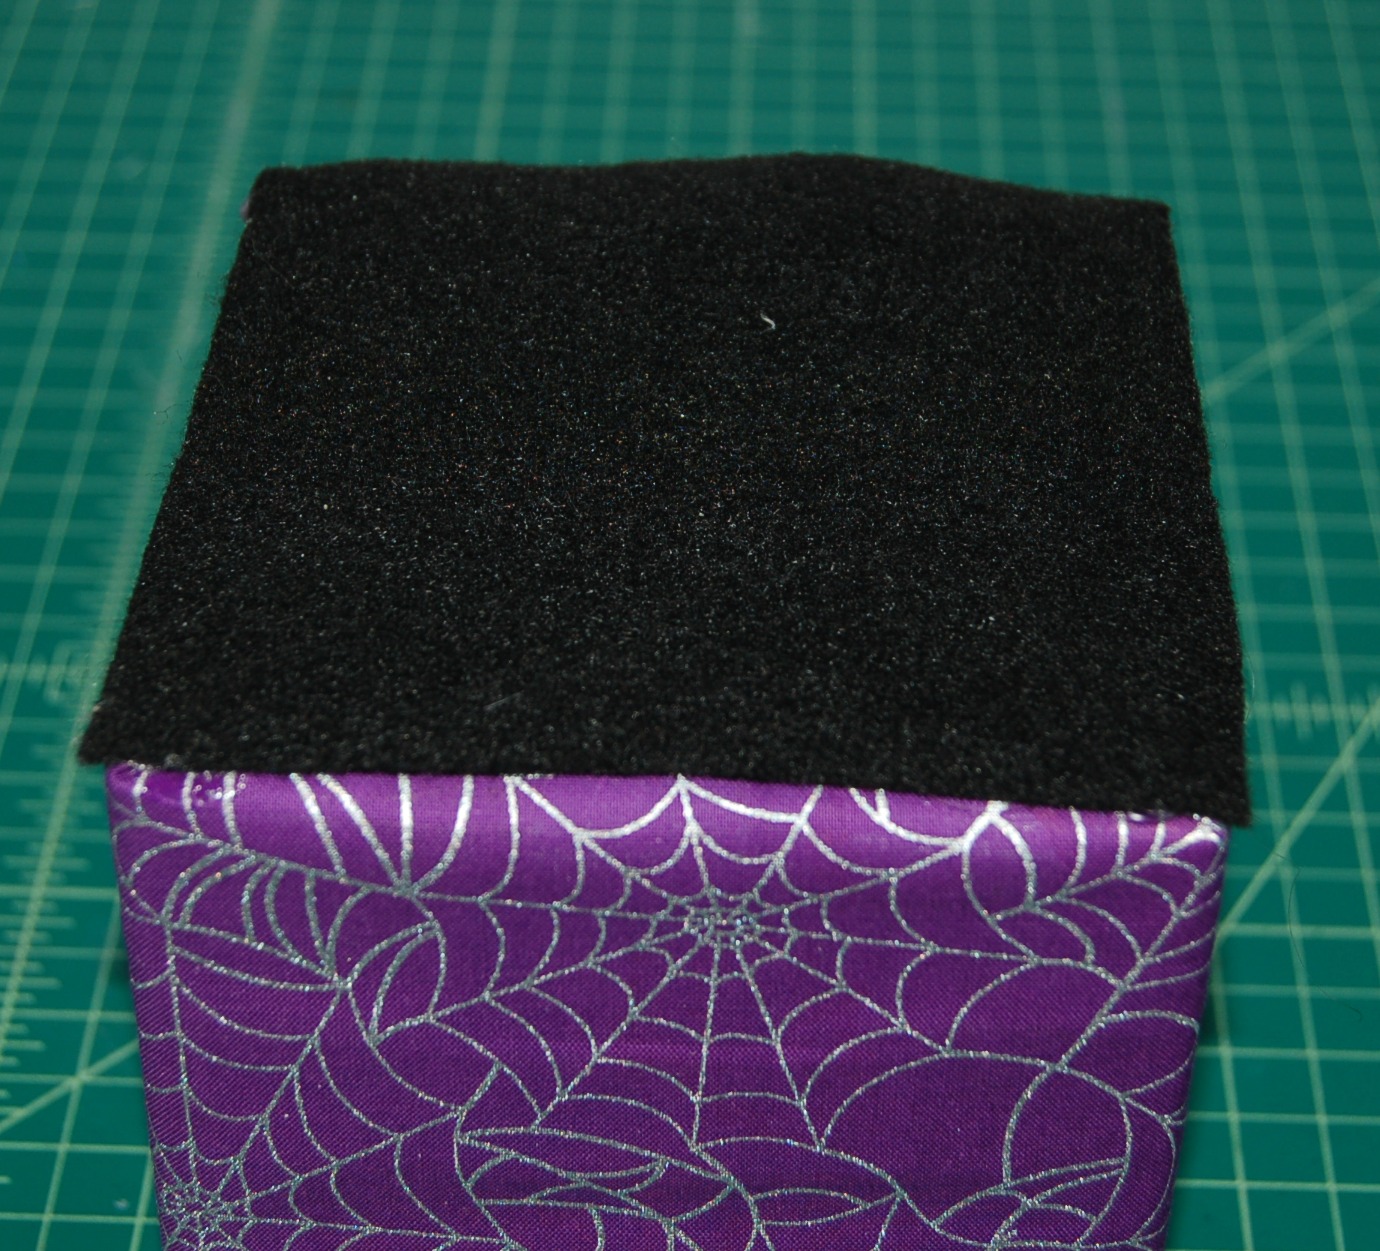
Do the same to the top of the box.
mystery box 5
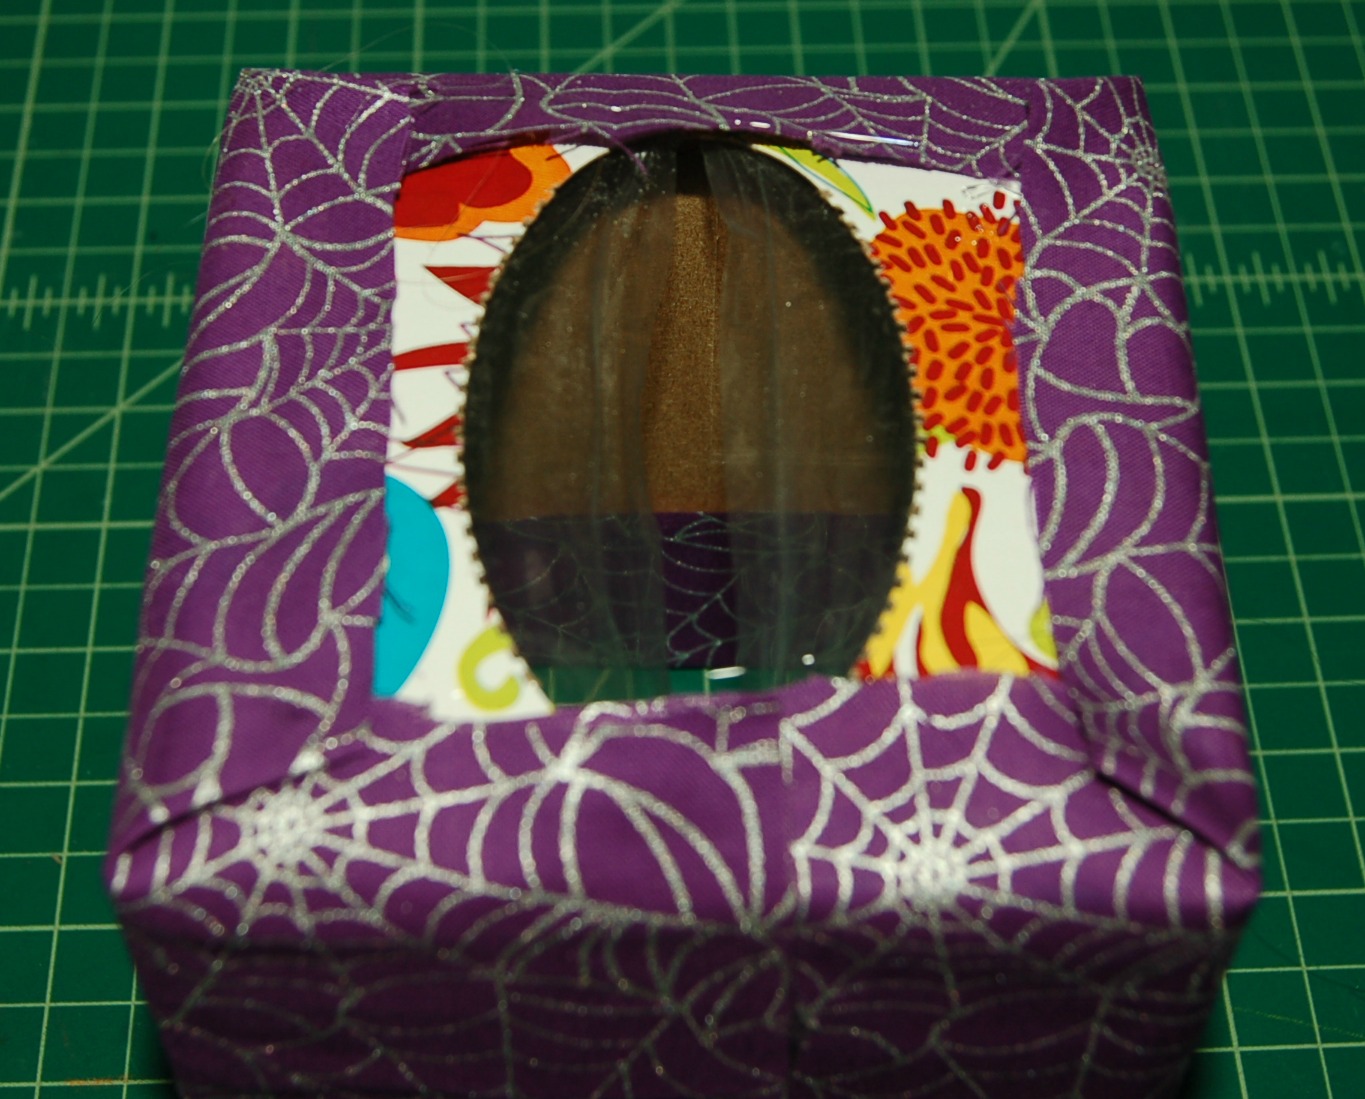
 Measure a piece of felt to the size of the top of your box and attach with hot glue all around the top edges.
mystery box 6
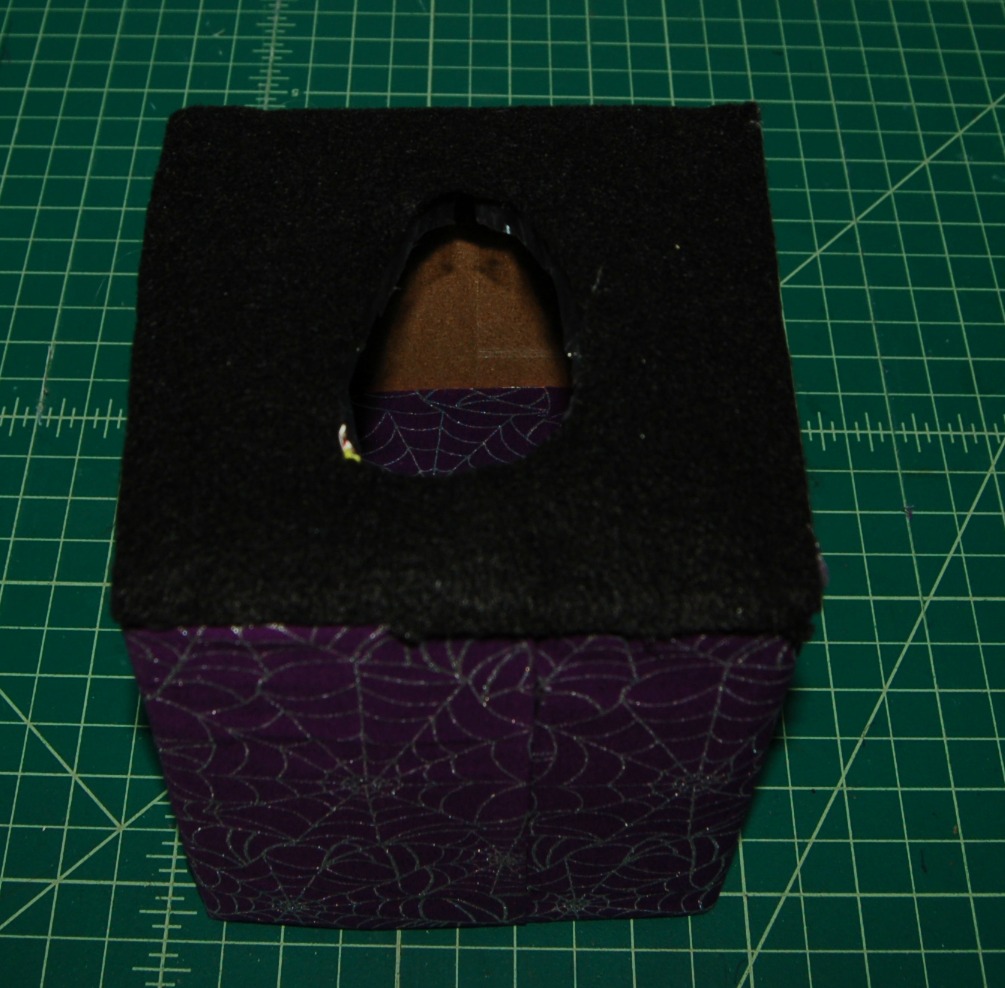
 Cut a hole in the center of the box for kids to reach their hands into.
mystery box 7
Last, throw on some decorations and you are done 🙂
mystery box 8
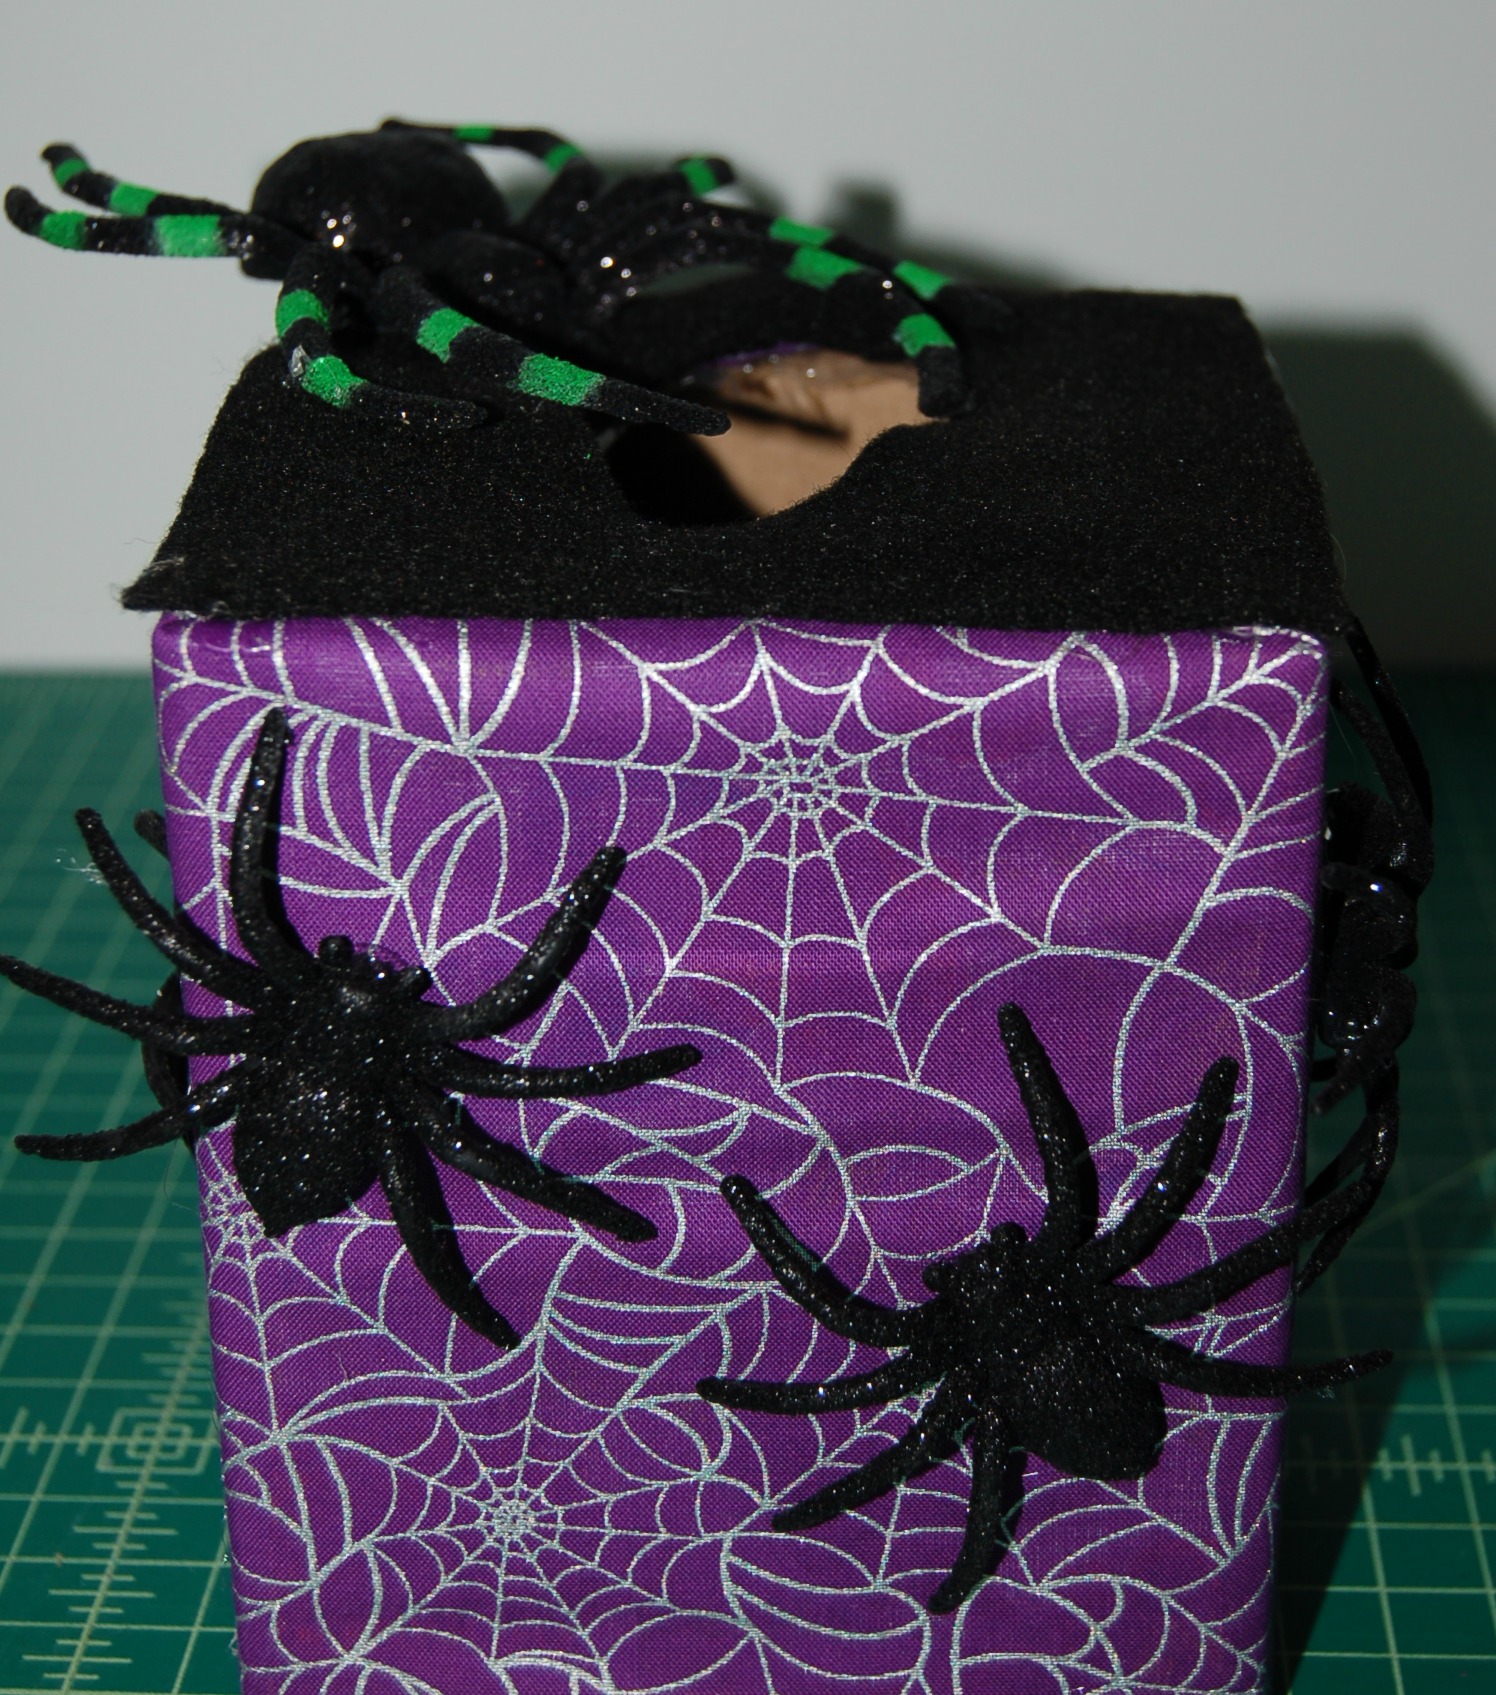
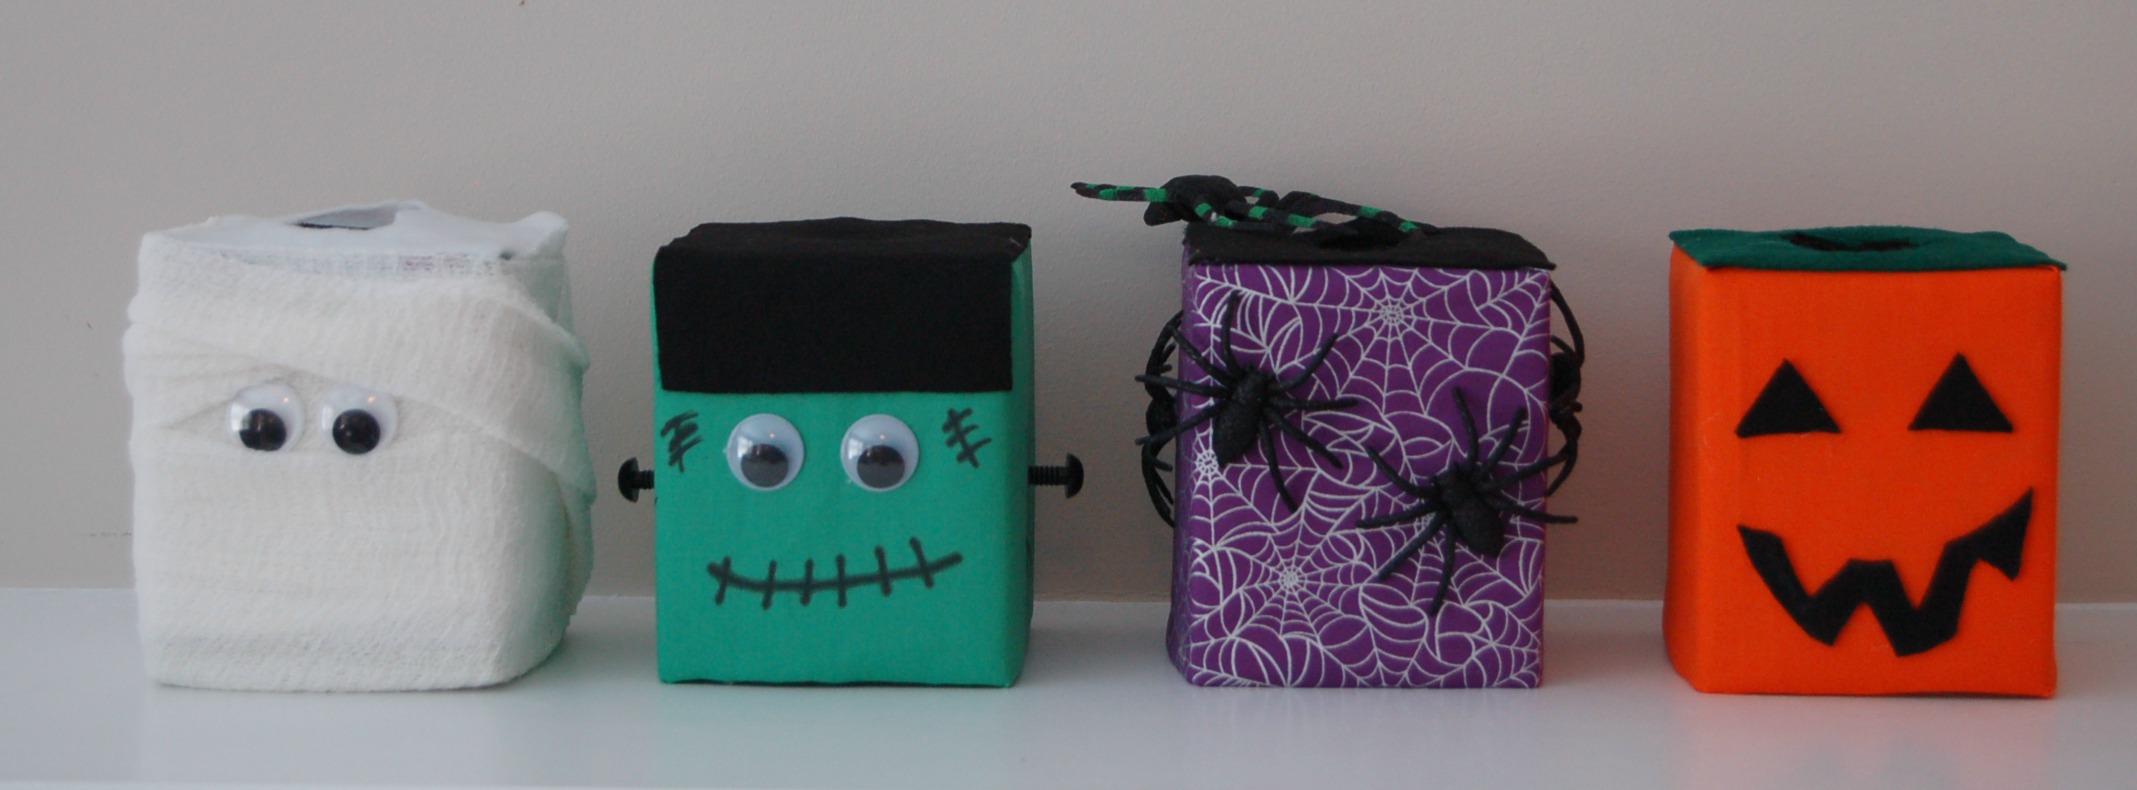
These are all the boxes that I created for our Halloween Mystery Box activity. I put spider legs (pipe cleaners) in the spider one, brains (spaghetti) in Frankenstein, eyeballs (peeled grapes) in the mummy and monster teeth (popcorn kernels) in the pumpkin.
mystery box 9
 The kids loved it and had a blast feeling all the gross stuff inside 🙂

Similar Posts

23 Comments

  1. Oh my goodness... the thought of feeling spaghetti and peeled grapes makes me cringe, yet laugh. I'll have to try this out. ;o)
  2. OMG - those look adorable. Such a cool idea for the kids
  3. So cute! & you make them seem so easy - I'll see about making these with my 10 year old sister - she loves to help with crafts.
  4. That's such a cuter way of doing this activity! I usually just throw everything into a bowl LOL
  5. What a super cute way to re-use tissue boxes. This is just adorable, I will have to try this too. My son would get a kick out of this ;)
  6. What a cute idea for a party and those boxes are so cute! I might have to make these for our homeschool party that is coming up!
  7. omg those are SO FLIPPING CUTE!! i want to make them!
  8. What a cute and FUN idea! I might just have to make these, my grandchildren would love them!
  9. How cool.. thats such a clever and cute idea... totally love them and the kids could even create their own... SOO super cute
  10. Wow! I'm a huge fan of anything recycled, and this is a great little project for Halloween. They are adorable!
  11. What a great idea! These boxes are too cute and I bet the kids really had a good time sticking their hand in the boxes!
  12. I love this idea for a kids' Halloween party! I might ask if I can bring this in to my son's daycare. They would love it, and it's really inexpensive!
  13. What a great idea for kids! I woudl totally put creepy crawlies in one and then make like a Fear Factor type gig out of it for a party!
  14. This is a great idea, and I Love how cute the boxes turned out.
  15. Love your post! So creative!! I am hosting my first ever Tuesday Link Up Party. I hope you can come over and link up with me!! I love meeting new ladies and getting to see all the amazing content everyone has to offer! http://liverandomlysimple.com/totally-terrific-tuesday-linkup-party-1/
  16. Love this idea, pinned because I am going to use at our class party! Saying hello from creativity unleashed! Cathy

Leave a Reply

Your email address will not be published. Required fields are marked *